Maxibright Daylight LED 660w Grow Light
In terms of ‘price versus performance’, the Maxibright LED grow light is one of the best LED grow lights we’ve tested so far. It produces an incredibly even footprint, and utilises highly efficient diodes that produce average output levels of 2.3 μmols per watt!
Contains
1 x Maxibright LED Grow Light, 1 x 180cm IEC power cable
Recomended Additional Purchase
CarboAir Rope Ratchet Hangers
How the Maxibright LED Grow Light Works
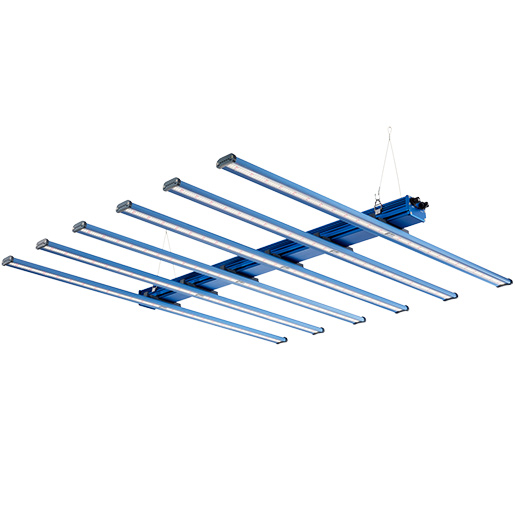
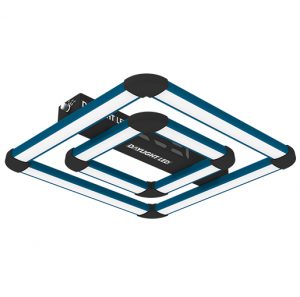
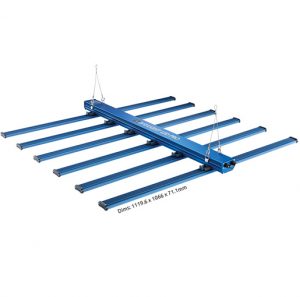
Having a review of the Maxibright LED, they have wisely chosen to adopt a “spider” design that matches the latest generation of LEDs, like the Gavita 1700e. Instead of concentrating diodes in a central spot and using lenses to direct the light outwards, Maxibright have opted to spread the diodes over a much wider area, using eight separate strips. This allows it to deliver a footprint that’s much more even than that of a regular HID lighting system or “module” type LED grow light.
The Maxibright Daylight LED Grow Light has been designed so that it’s easier to transport than similar alternatives. For this reason, you’ll need to assemble it when you receive it, which can be done comfortably in 5-10 minutes. This means that you can get it through tight spaces like loft hatches. It comes in a box that’s easy to transport and store, and won’t require a pallet delivery.
The Maxibright LED grow light emits intense levels of red light that will cause fruits to swell up in size as you progress through the flowering stages. Naturally, the unit is full spectrum, so there’s also a very healthy level of blue in there to keep the stretching down and optimise the quality of the crop. There’s some far-red too which stimulates the flowering / fruiting process. You can see the superbly optimised spectrum below:
How to use the Maxibright LED Grow Light
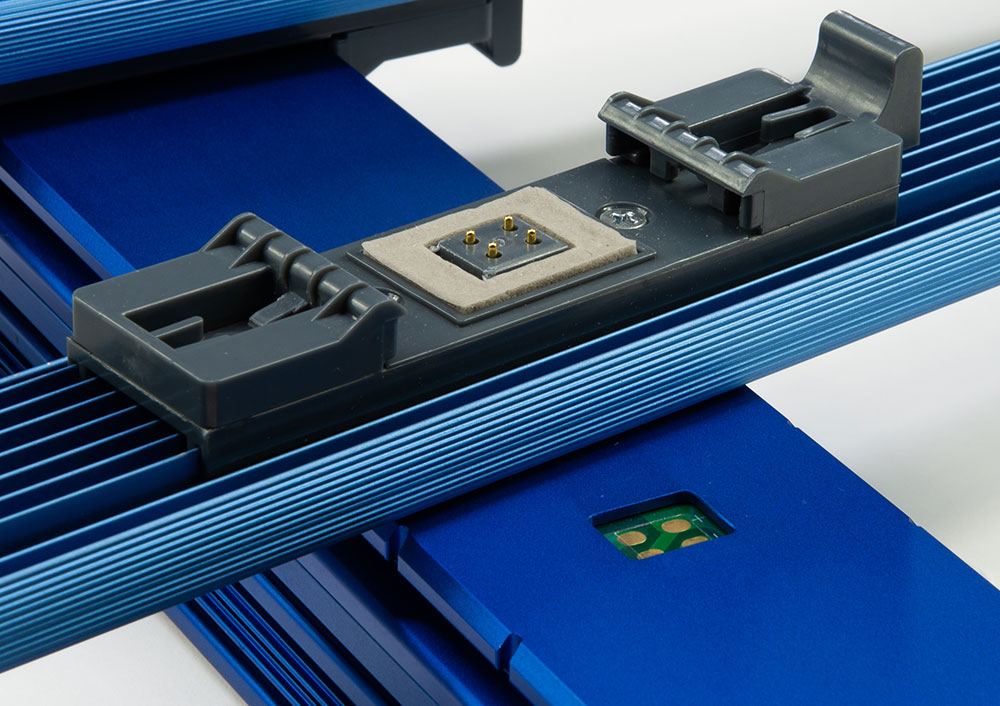
The first thing to do is slide the eight LED strips into the main body making sure that the cable on each bar is on the side of the sockets on the main body. Spread them out to your preference but for a 1.2m square grow space we would recommend you place the end 2 as close to the end of the main body as possible. Spread the other six bars so that they fill the space in-between evenly. Fit and tighten the hand-wheel bolts on each side of the bars to secure them in place.
Please note: Although Maxibright’s own instruction manual states that the bars can be angled by 30°, we found that this is actually not the case.
Plug the leads on the bars of the Maxibright LED into the appropriate socket for each one on the main body. There is a notch on the inside of the plugs which lines up with a nodule inside the socket. This makes sure it is plugged in the correct way around to prevent accidentally getting the DC polarity reversed.
Next screw in the four hanging eyelet bolts. They screw in two at each end, either side of the main body. Make sure that they are all the eyelets bolts are aligned vertically otherwise the Maxibright LED will not hang flat. Snap on the hanging wires. The unit can now be hung by the loop in the middle of the hanging wires. You should note that, at 15.5kg, it’s not the lightest unit, so you’ll need to make sure that you secure it properly. The unit is a bit too heavy for hanging with easy rolls. Instead, we recommend rope ratchets or jack chain.
Next, use the power lead to plug the Maxibright LED into the mains and switch it on. Check that all the bars are lit. If any do not light up then double check that the plug for those bars are plugged in the right way around.
The unit can now be dimmed to the desired level by turning the dimmer knob.
The Maxibright LED is designed to be used over a 120cm x 120cm square area. In this situation it offers an incredibly even footprint. We found that 60cm above the canopy is good for veg but for small plants you might want to begin up to a metre above the tops of the plants and reduce the height gradually over the course of a week or two. If you see any signs of stress (leaves hanging down as though they were wilting) then raise the Maxibright LED up again.
For flowering, we found that 45cm – 55cm is about right. Experiment a little to find the right height for your strain for best results. We’ve had customer feedback stating that they can get their Maxibright LED extremely close (less than half a metre) to the top of the canopy, but bear in mind, this depends on the strength of your plants. We’d recommend using an infared thermometer and keeping your canopy at 26 degrees centigrade for optimal results.
KEY FEATURES
- Produces intense, full-spectrum light that your plants will love
- Slimmer, more compact, IP65 rated
- Total fixture efficiency of 2.3 μmols per watt
- Gives you a “red heavy” spectrum, allowing your crop to pile on huge weight during the flowering stage
- Dimmable from 100% down to 30% with the supplied controller
- The Maxibright LED hits your plants with light from many directions and angles to maximise yields
- Represents exceptional value for money – amazing bang for buck
- Supplied dismantled so that it can fit through tight spaces (up loft hatches, etc.)
- Built with super-efficient Lumiled and Osram LEDs
- “Spider” design gives the best (most uniform) light spread possible
- Passive heatsink cooling – no fans
- Optimised to produce the goods in a 1.2m x 1.2m or 1.5m x 1.5m grow tent
- Very low profile – great for those with little headroom
- The Maxibright LED is easy to assemble unlike some other similar LEDs on the market
- Total PPF of 1518 µmols per second
- Has a whopping 50,000 hour life-span (equivalent to 11.42 years on a 12/12 cycle)
- 3 Years Manufacturer’s Warranty